


The term toolbox signifies the scene from a hollywood film where a man in the basement is working on wooden blocks to build something in the middle of the day with varieties of tool box which help him to create something new from the scratch. And as a graphic designer ‘writer’ where I’m working hard to create a easy and learning space for the new joinee into the industry. And where we are talking about the toolbox, GIMP is the OG platform to grab some fantastic facts and experience the core of graphic editing skills.
So let’s not waste too much and get into the learning spectrum and explore the wildest toolset of GIMP software.
A Never Ending Tool Box
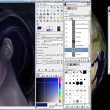
GIMP provides a comprehensive toolbox to quickly perform basic tasks such as making selections or drawing paths. The many tools contained within GIMP's Toolbox are discussed in detail here.
(In case you're curious, in GIMP lingo, a “tool” is a way of acting on an image that requires access to its display, either to let you indicate what you want to do by moving the pointer around inside the display, or to show you interactively the results of changes that you have made. But if you want to think of a tool as a saw and an image as a piece of wood, it probably won't harm you.)
GIMP has a diverse assortment of tools that let you perform a large variety of tasks. The tools can be thought of as falling into five categories:
Selection tools, which specify or modify the portion of the image that will be affected by subsequent actions;
- Paint tools, which alter the colors in some part of the image;
- Transform tools, which alter the geometry of the image;
- Color tools, which alter the colors in the image as a whole;
- Other tools, which don't fall into the other three categories.
Tool Icons
With GIMP-2.10.18, tool icons can be grouped, and this option is enabled by default. Tools groups are marked with a small dark triangle at the bottom right corner of the icon. The group icon displayed is the first icon in the group. Right click on the group icon to display the list of tools in the group.
You can get the former display back unchecking the Use tool groups option i
Most tools can be activated by clicking on an icon in the Toolbox. By default, some tools are accessible only via the menus (namely the Color tools are accessible only either as Colors or as Tools → Colors). Every tool, in fact, can be activated from the Tools menu; also, every tool can be activated from the keyboard using an accelerator key.
In the default setup, created when GIMP is first installed, not all tools show icons in the Toolbox: the Color tools are omitted. You can customize the set of tools that are shown in the Toolbox in the Interface > Toolbox page of the Preferences.
There are two reasons you might want to do this: first, if you only rarely use a tool, it might be easier to find the tools you want if the distracting icon is removed; second, if you use the Color tools a lot, you might find it convenient to have icons for them easily available. In any case, regardless of the Toolbox, you can always access any tool at any time using the Tools menu from an image menubar.
The shape of the cursor changes when it is inside an image, to one that indicates which tool is active (if in Preferences you have set Image Windows → Mouse Pointers → Pointer mode → Tool icon).
Color And Indicator Area
Color area
This area shows GIMP's basic palette, consisting of two colors, the Foreground and Background, used for painting, filling, and many other operations. Clicking on either of the color displays brings up a Color Editor dialog, which permits you to change it.
Default colors
Clicking on this small symbol resets the Foreground and Background colors to black and white, respectively. Pressing the D key has the same effect.
Swap FG/BG colors
Clicking on the small curved line with two arrowheads causes the Foreground and Background colors to be swapped. Pressing the X key has the same effect.
Tool Option
Each tool has its own specific set of options. The choices you make for them are kept throughout the session, until you change them. In fact, the tool options are maintained from session to session. The persistence of tool options across sessions can sometimes be an annoying nuisance: a tool behaves very strangely, and you can't figure out why until you remember that you were using some unusual option the last time you worked with it, two weeks ago.
At the bottom of the Tool Options dialog, four buttons appear:
Save Tool Preset…
This button allows you to save the settings for the current tool, so that you can restore them later. It brings up the Section 5.1, “Tool Presets Dialog” allowing you to give a name for the new preset. When you Restore options, only saved presets for the active tool are shown, so you need not worry about including the name of the tool when you assign a name here.
Restore Tool Preset…
This button allows you to restore a previously saved preset of options for the active tool. If no presets have ever been saved for the active tool, the button will be insensitive. Otherwise, clicking it will bring up a menu showing the names of all saved option sets: choosing a menu entry will apply those settings.
Delete Tool Preset
This button allows you to delete a previously saved set of options for the active tool. If no option-sets have ever been saved for the active tool, the button will simply repeat the tool name. Otherwise, clicking it will bring up a menu showing the names of all saved presets: the selected preset will be deleted.
Reset to default values
This button resets the options for the active tool to their default values. If you hold the Shift key while pressing the Reset button, the options for all tools will be reset to their default values.
In addition to the commands for the above buttons, the Tool Options tab menu has an extra submenu:
Edit Tool Preset
This submenu shows a list of presets for the active tool that you can edit. Selecting one of them will open the Tool Presets Editor with that tool preset loaded. From there you can edit the preset, unless it is one of the default presets that come with GIMP.
Below we will explain the interaction with sliders and the mouse scroll-wheel.
New sliders
Option sliders have changed with GIMP-2.10.18: Sliders typically used in GEGL-based filters and tools’ options now have a compact style by default: they take a lot less space vertically and have a vastly improved behavior. You can use multiple modifiers with either left-click or mouse wheel scrolling:
- Left-click + drag changes a value with a default increment.
- Shift + left-click + drag (or right-click + drag) changes a value with a smaller step .
- Ctrl + left-click + drag changes a value with a larger step.
Once you have set the value approximately, you can tune it precisely using the two small arrow buttons at the right of the slider.
The value area in the slider area works as a text editor: there, you can edit the value or enter a new value directly.
For some options, you can drag the pointer outside the tool dialog. For example with the size slider, you can get the maximum value (10000) so.
Mouse Scroll-Wheel actions on canvas
When using tools, you can use the mouse scroll-wheel, in combination with various modifiers, to do useful things with the tool options of the selected tool:
- Alt + Mouse-wheel: increase/decrease opacity
- Shift + Primary + Mouse-wheel: increase/decrease aspect ratio
- Shift + Alt + Mouse-wheel: increase/decrease angle
- Primary + Alt + Mouse-wheel: increase/decrease size
- Shift + Primary + Alt + Mouse-wheel: increase/decrease spacing
- Note: the Primary modifier is usually Ctrl or Cmd, depending on your platform.
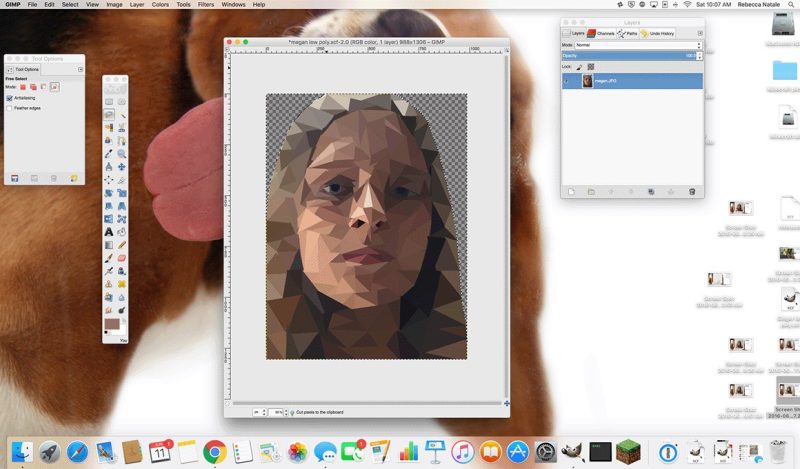
Selection Tool
Selection tools are designed to select regions from the active layer so you can work on them without affecting the unselected areas. Each tool has its own individual properties, but the selection tools also share a number of options and features in common. These common features are described here; the variations are explained in the following sections for each tool specifically. If you need help with what a “selection” is in GIMP, and how it works, see Selection.
There are seven selection tools:
- the Rectangle Select;
- the Ellipse Select;
- the Free Select (the Lasso);
- the Select Contiguous Regions (the Magic Wand) ;
- the Select by Color;
- the Select Shapes from Image (Intelligent Scissors) and
- the Foreground Select.
In some ways the Path tool can also be thought of as a selection tool: any closed path can be converted into a selection. It also can do a great deal more, though, and does not share the same set of options with the other selection
The behavior of selection tools is modified if you hold down the Ctrl, Shift, and/or Alt keys while you use them.
Note
Advanced users find the modifier keys very valuable, but novice users often find them confusing. Fortunately, it is possible for most purposes to use the Mode buttons (described below) instead of modifier keys.
Ctrl
When creating a selection, holding down the Ctrl key can have two different actions according to the way you use it:
Holding down the key while drawing the selection toggles the “Expand from center” option.
If you hold down the Ctrl key before drawing a selection, this new selection switches to the Subtract mode. So, this new selection will be subtracted from an existing one as soon as you release the click, as far as they have common pixels.
Alt
Holding Alt will allow movement of the current selection (only its frame, not its content). If the whole image is moved instead of the selection only, try Shift+Alt. Note that the Alt key is sometimes intercepted by the windowing system (meaning that GIMP never knows that it was pressed), so this may not work for everybody.
Shift
When creating a selection, holding down the Shift key can have two different actions according to the way you use it:
If you hold down the key before clicking to start the selection, this selection will be in Addition mode as long as you press the key.
If you hold down the Shift key after clicking to start the selection, the effect will depend on the tool you are using: for example, the selection will be a square with the Rectangle Select tool.
Ctrl+Shift
Using Ctrl+Shift together can do a variety of things, depending on which tool is used. Common to all selection tools is that the selection mode will be switched to intersection, so that after the operation is finished, the selection will consist of the intersection of the region traced out with the pre-existing selection. It is an exercise for the reader to play with the various combinations available when performing selections while holding Ctrl+Shift and releasing either both or either prior to releasing the mouse Left Button.
Key modifiers to move selections
Ctrl+Alt+Left-click-and-drag and Shift+Alt+Left-click-and-drag are used to move selections. See Section 2.1, “Moving or Resizing a Selection”.
Space bar
Pressing the Space bar while using a selection tool transforms this tool into the Navigation cross as long as you press the bar, allowing you to pan around the image instead of using the scroll-bars when your image is bigger than the canvas. This is the default option: in Preferences/Image Windows, you can toggle the Space bar to the Move tool.
Options Bar
we describe the tool options that apply to all selection tools: options that apply only to some tools, or that affect each tool differently, are described in the sections devoted to the individual tools. The current settings for these options can be seen in the Tool Options dialog, which you should always have visible when you are using tools. To make the interface consistent, the same options are presented for all selection tools, even though some of them don't have any effect for some of the tools.
Common Options Of Selection Tools
Mode
This determines the way that the selection you create is combined with any pre-existing selection. Note that the functions performed by these buttons can be duplicated using modifier keys, as described above. For the most part, advanced users use the modifier keys; novice users find the mode buttons easier.
- Replace mode will cause any existing selection to be destroyed or replaced when the new selection is created.
- Add mode will cause the new selection to be added to any existing selection regions.
- Subtract mode will remove the new selection area from any existing selection regions.
- Intersection mode will make a new selection from the area where the existing selection region and the new selection region overlap.
Antialiasing
This option only affects some selection tools: it causes the boundary of the selection to be drawn more smoothly.
Feather Edges
This options allows the boundary of the selection to be blurred, so that points near the boundary are only partially selected. For further information regarding feathering, see the glossary entry Feathering.
When this option is checked, a Radius option appears. Default value is 10 pixels: higher image resolution, higher radius.
Paint Tool
The feature they all have in common is, that all of them are used by moving the pointer across the image display, creating brush-strokes. Five of them behave like the intuitive notion of “painting” with a brush. Pencil, Paintbrush, Airbrush, and MyPaint brush (introduced in GIMP 2.10.6) are called “basic painting tools” or brush tools.
- The Pencil Tool.
- The Paintbrush Tool.
- The Airbrush Tool.
- The Ink tool.
- The MyPaint Brush Tool.
The other tools use a brush to modify an image in some way rather than paint on it:
- the Bucket Fill Tool fills with color or a pattern;
- the Gradient Tool fills with gradients;
- the Eraser Tool erases;
- the Clone Tool copies from a pattern, or image;
- the Perspective Clone Tool copies into a changed perspective;
- the Heal Tool corrects small defects;
- the Blur/Sharpen Tool blurs or sharpens;
- the Smudge Tool smears;
- and the Dodge/Burn Tool lightens or darkens.
The advantages of using GIMP with a tablet instead of a mouse probably show up more clearly for brush tools than anywhere else: the gain in fine control is invaluable. These tools also have special “Pressure sensitivity” options that are only usable with a tablet.
In addition to the more common “hands-on” method, it is possible to apply paint tools in an automated way, by creating a selection or path and then “stroking” it. You can choose to stroke with any of the paint tools, including nonstandard ones such as the Eraser, Smudge tool, etc., and any options you set for the tool will be applied. See the section on Stroking for more information
Ctrl
Holding down the Ctrl key has a special effect on every paint tool. For the Pencil, Paintbrush, Airbrush, Ink, and Eraser, it switches them into “color picker” mode, so that clicking on an image pixel causes GIMP's foreground to be set to the active layer's color at that point (or, for the Eraser, GIMP's background color). For the Clone tool, the Ctrl key switches it into a mode where clicking sets the reference point for copying. For the Blur/Sharpen tool, the Ctrl key switches between blur and sharpen modes; for the Dodge/Burn tool, it switches between dodging and burning.
Shift
Holding down the Shift key has the same effect on most paint tools: it places the tool into straight line mode. To create a straight line with any of the paint tools, first click on the starting point, then press the Shift key. As long as you hold it down, you will see a thin line connecting the previously clicked point with the current pointer location. If you click again, while continuing to hold down the Shift key, a straight line will be rendered. You can continue this process to create a series of connected line segments.
Ctrl+Shift
Holding down both keys puts the tool into constrained straight line mode. This is similar to the effect of the Shift key alone, except that the orientation of the line is constrained to the nearest multiple of 15 degrees. Use this if you want to create perfect horizontal, vertical, or diagonal lines.
Many tool options are shared by several paint tools: these are described here. Options that apply only to one specific tool, or to a small number of tools, are described in the sections devoted to those tools.
Mode
The Mode drop-down list provides a selection of paint application modes. As with the opacity, the easiest way to understand what the Mode setting does is to imagine that the paint is actually applied to a layer above the layer you are working on, with the layer combination mode in the Layers dialog set to the selected mode. You can obtain a great variety of special effects in this way. The Mode option is only usable for tools that can be thought of as adding color to the image: the Pencil, Paintbrush, Airbrush, Ink, and Clone tools. For the other paint tools, the option appears for the sake of consistency but is always grayed out. A list of modes can be found in Section 2, “Layer Modes”.
In this list, some modes are particular and are described below.
Opacity
The Opacity slider sets the transparency level for the brush operation. To understand how it works, imagine that instead of altering the active layer, the tool creates a transparent layer above the active layer and acts on that layer. Changing Opacity in the Tool Options has the same effect that changing opacity in the Layers dialog would have in the latter situation. It controls the “strength” of all paint tools, not just those that paint on the active layer. In the case of the Eraser, this can come across as a bit confusing: it works out that the higher the “opacity” is, the more transparency you get.
Brush
The brush determines how much of the image is affected by the tool, and how it is affected, when you trace out a brushstroke with the pointer. GIMP allows you to use several different types of brushes, which are described in the Brushes section. The same brush choices are available for all paint tools except the Ink tool, which uses a unique type of procedurally generated brush. The colors of a brush only come into play for tools where they are meaningful: the Pencil, Paintbrush, and Airbrush tools. For the other paint tools, only the intensity distribution of a brush is relevant.
Size
This option lets you to modify precisely the size of the brush. You can use the arrow keys to vary by ±0.01 or the Page-Up and Page-Down keys to vary by ±1.00. You can obtain the same result if you have correctly set your mouse-wheel in the Preferences. See How to vary the size of a brush
Aspect Ratio
This determines the ratio between the height and the width of the brush. The slider is scaled from -20.00 to 20.00 with the default value set to 0.00. A negative value from 0.00 to -20 will narrow the height of the brush while a positive value between 0.00 and 20.00 indicates the narrowing rate of the width of the brush.
Angle
This option makes the brush turn round its center. This is visible if the brush is not circular or made from a rotated figure.
Spacing
This option sets the distance between the brush marks in a stroke.
Different spacings
Hardness
Modifies the size of the brush hard center
On the left: hardness=50 On the right: hardness=100.
Force
Modifies gain.
Force is 10%, 20%, 40%, 80%
Dynamics
Brush dynamics let you map different brush parameters to several input dynamics. They are mostly used with graphic tablets, but some of them are also usable with a mouse.
You can read more about dynamics in Dynamics
When stroking paths and selections using a paint tool there is an option to select “Emulate brush dynamics”. That means that when you stroke, brush pressure and velocity are varying along the length of the stroke. Pressure starts with zero, ramps up to full pressure and then ramps down again to no pressure. Velocity starts from zero and ramps up to full speed by the end of the stroke.
Dynamics Options
These options are described in Dynamics Options
Apply Jitter
You know “spacing” in brush strokes: strokes are made of successive brush marks which, when they are very near, seem to draw a continuous line. Here, instead of being aligned brush marks are scattered over a distance you can set with the Amount slider
From top to bottom: without jitter, jitter = 1, jitter = 4
Jitter is also available in the Paint Dynamic Editor where you can connect jitter to the behavior of the brush.
Smooth Stroke
This option doesn't affect the rendering of the brush stroke but its “shape”. It takes away the wobbles of the line you are drawing. It makes drawing with a mouse easier.
When this option is checked, two setting areas appear, Quality and Weight. You can change the default values to adapt them to your skill.
High weight values rigidifies the brush stroke.
Trying to draw a straight line and a sine curve with the mouse. 1 : option unchecked 2 : default values 3 : maximum values
Lock brush size to view
When you are working on an image that is bigger (in pixels) than your screen, you have to zoom in and out a lot. This option allows a very natural “iterative refinement” process with no need to repeatedly ask the application to change brush size as you go between the broad strokes and the detailing.
If the brush size is relative to the canvas (option unchecked), zooming in makes the brush zoomed also and it appears larger (takes up more pixels on the screen). If you're working with a 300 pixels radius brush and you zoom in from 12% to 100%, the brush is now half the size of your screen! So you have to shrink the brush back down.
If the brush size is relative to the screen (option checked), then when you zoom in, the size of the displayed brush doesn't change, it looks smaller and so you can work on tiny details.
Figure 14.45. Lock brush example
This image is the screenshot of a small part of a TIFF image bigger than my screen. Here, GIMP displays this TIFF image at 50% zoom, so the whole image is visible. The option is not checked, brush size in toolbox is 100 pixels high.
Screenshot: zoom 200. The option is not checked. We paint with pencil and the pepper brush that is 100 pixels high in toolbox: displayed brush stroke is 200 pixels high.
Screenshot: zoom 200. The option is checked. We paint with pencil and the pepper brush that is 100 pixels high in toolbox: displayed brush stroke is 100 pixels high.
“Lock brush to view” can also be used to lock brush to view rotation:
Figure 14.46. Lock brush to view rotation example
Screenshot. Here, the option is unchecked and we use View → Flip and Rotate → Rotate 15° clockwise: brush stroke is rotated.
Same thing but the option is checked: the brush is locked to the original, not rotated view and brush stroke is not rotated.
Incremental
Applies the effect incrementally as the mouse pointer moves.
The incremental checkbox does not seems to work as everyone expect. If it is deactivated (the default value) the maximum effect of a single stroke is determined by the opacity set in the opacity slider. If the opacity is set to less than 100, moving the brush over the same spot will increase the opacity if the brush is lifted in the meantime. Painting over with the same stroke has no such effect. If Incremental is active the brush will paint with full opacity independent of the slider's setting. This option is available for all paint tools except those which have a “rate” control, which automatically implies an incremental effect. See also Section 2, “Layer Modes”.
Paint Mode Examples
The following examples demonstrate some of GIMP's paint modes:
Dissolve
Figure 14.47. Dissolve mode example
Two brush-strokes made with the Airbrush, using the same fuzzy circular brush. Left: Normal mode. Right: Dissolve mode.
For any paint tool with opacity less than 100%, this very useful mode doesn't draw transparency but determines the probability of applying paint. This gives nice patterns of dots to paint-strokes or filling.
Figure 14.48. Painting in Dissolve mode
This image has only the background layer and no Alpha channel. The background color is sky blue. Three strokes with Pencil and various opacities: 100%, 50%, 25%. Foreground color pixels are scattered along brushstroke.
Behind
Figure 14.49. Example for layer mode “Behind”
Wilber over a blue background layer
Layers dialog
Filled with pattern
This mode applies paint only to transparent areas of the layer: the lower the opacity, the more paint is applied. Thus, painting opaque areas has no effect; painting transparent areas has the same effect as normal mode. The result is always an increase in opacity. Of course none of this is meaningful for layers that lack an alpha channel.
In the above example image, Wilber is on the top layer, surrounded by transparency. The lower layer is solid light blue. The Bucket Fill tool was used, with the Fill Whole Selection option checked and the entire layer was selected. A pattern was used to paint with the Bucket Fill tool.
The next image (below) has two layers. The upper layer is active. Three brush strokes with pencil, red color at 100%, 50%, 25%: only transparent or semi-transparent pixels of the layer are painted.
Figure 14.50. Painting in “Behind” mode
Painting with 100%, 50%, 25% transparency (from left to right)
Color Erase
Figure 14.51. Example for layer mode “Color erase”
Wilber over a blue background layer
White foreground color erased
This mode erases the foreground color, replacing it with partial transparency. It acts like the Color to Alpha filter, applied to the area under the brushstroke. Note that this only works on layers that possess an alpha channel; otherwise, this mode is identical to Normal.
In the above example image, the color of the Bucket Fill tool was white, so white parts of Wilber were erased and the blue background shows through.
This image below has only one layer, the background layer. Background color is sky blue. Three brush strokes with pencil:
- With the exact color of the blue area: only this blue color is erased.
- With the exact color of the red area. Only this red color is erased, whatever its transparency. Erased areas are made transparent.
- With the sky blue color of the layer background: only this color is erased.
Figure 14.52. Painting in “Color Erase” mode
Painted with 1. blue; 2. red; 3. background color
Advanced users may be interested to know that paint tools actually operate at a sub-pixel level, in order to avoid producing jagged-looking results. One consequence of this is that even if you work with a hard-edged brush, such as one of the Circle brushes, pixels on the edge of the brushstroke will only be partially affected. If you need to have all-or-nothing effects (which may be necessary for getting a good selection, or for cutting and pasting, or for operating pixel-by-pixel at a high zoom level), use the Pencil tool, which makes all brushes perfectly hard and disables sub-pixel anti-aliasing.
Transforming Tools
Inside the Transformation tool dialog, you will find eight tools to modify the presentation of the image or the presentation of an element of the image, selection, layer or path. Each transform tool has an Option dialog and an Information dialog to set parameters. Some options are shared by several transform tools. We will describe them here. More specific options will be described with their tool.
Transform
GIMP offers you three buttons which let you select which image element the transform tool will work on.
When you activate the first button the tool works on the active layer. If no selection exists in this layer, the whole layer will be transformed.
- When you activate the second button the tool works on the selection contour only (the whole layer contour if no selection).
- When you activate the third button, the tool works on the path only.
- When you activate the fourth button, new in GIMP-2.10.14, the transformation is applied to all layers.
Figure 14.112. Example with Rotate - Two layers, the red one being smaller. View/Show All option checked.
- Fourth button pressed, Rotate tool applied. Note the adaptation of layer sizes.
- Of course, you can get the same result linking layers, but this new option is easier to use.
Direction
This option sets which way or direction a layer is transformed:
The “Normal (Forward)” mode will transform the image or layer as one might expect. You just use the handles to perform the transformation you want. If you use a grid (see below), the image or layer is transformed according to the shape and position you put the grid into.
“Corrective (Backward)” inverts the direction. Primarily used with the Rotation tool to repair digital images that have some geometric errors (a horizon not horizontal, a wall not vertical…). See Section 4.5, “Rotate”.
With GIMP-2.10.10, you can link these two options in Rotate, Scale, Perspective, Unified transform and Handle transform tools. This allows moving handles without affecting the transformation, letting you manually readjust their position.
Interpolation
This drop-down list lets you choose the method and thus the quality of the transformation:
None
The color of each pixel is copied from its closest neighboring pixel in the original image. This often results in aliasing (the “stair-step” effect) and a coarse image, but it is the fastest method. Sometimes this method is called “Nearest Neighbor”.
Linear
The color of each pixel is computed as the average color of the four closest pixels in the original image. This gives a satisfactory result for most images and is a good compromise between speed and quality. Sometimes this method is called “Bilinear”.
Cubic
The color of each pixel is computed as the average color of the eight closest pixels in the original image. This usually gives a good result, but it naturally takes more time. Sometimes this method is called “Bicubic”.
LoHalo, NoHalo
Halo is an artifact that can be created by interpolation. It remembers the halo you can get when using Section 4.8, “Sharpen (Unsharp Mask)”. Here is a note from Nicolas Robidoux, the creator of the new quality samplers for GEGL and GIMP:
“If haloing is not an issue with your content and use case,
which of the two should you try first?
(Clearly, if you want to minimize haloing, NoHalo is the
ticket.)
If you are reducing an image, LoHalo is generally better.
If your transformation is not an all around reduction, for
example if you enlarge, rotate or apply a perspective
transformation that keeps portions of the image at the same or
higher resolution, I generally prefer NoHalo. This preference,
however, changes depending on the image content. If, for
example, the image contains text or text-like objects or has
significant areas with only a handful of different colours,
like old school pixel art, I’d switch to LoHalo. Likewise if
the image is quite noisy or marred by compression artifacts
(as are most JPEGs found on the web). Conversely, if the
image is noise free, very slightly blurry (meaning that when
pixel peeking, the lines and interfaces are smeared over two
or more pixels), and there are delicate skin tones to be
preserved, I’d try NoHalo first. Actually, if I find that
colours have not been preserved nicely after transforming an
image with LoHalo, I’d immediately switch to NoHalo, even if
reducing.
In any case, these recommendations should not be taken as
gospel. I still have much to learn and figure out. For
example, how best to deal with transparency and different
colour spaces is something I’m likely to be thinking about
for a while.”
You can set the default interpolation method in the Tools Options Preferences dialog.
Clipping
After transformation, the image can be bigger. This option will clip the transformed image to the original image size.
You can choose between several ways to clip:
Adjust
Figure 14.113. Original image for examples
Original image
Rotation applied with “Adjust”
Rotation applied with “Adjust” and canvas enlarged to layer size
With Adjust: the layer is enlarged to contain all the rotated layer. The new layer border is visible; the whole layer becomes visible by using the Image → Fit Canvas to Layers command.
Clip
Figure 14.114. Example for Clip
Clip
With Clip: all what exceeds image limits is deleted.
Crop to result
Figure 14.115. Example for Crop to result
Rotation 45° with Crop to result
The crop limit is marked with red. No transparent area is included.
If this option is selected, the image is cropped so that the transparent area, created by the transform operation in corners, will not be included in the resulting image.
Crop with aspect
Figure 14.116. Example for Crop with aspect
Original image
Rotation -22°
The rotated image
This option works like the one described before, but makes sure, that the aspect ratio is maintained.
Show image preview
If this is marked, which is the default setting, the transformed image will be visible on top of the original image or layer. There will also be a slider with which you may select the preview opacity.
Composited preview
Show preview as part of the image composition: when you have multiple layers, each one with its own blending mode and opacity, transforming it means it pops up right above every other layer. So in a complex layers composition you can't align this layer against other layers without much trial and error.
The new Composited Preview option removes this problem in favor of rendering the preview of the transformed layer exactly where it is in the layers stack, exactly with the opacity and blending mode of choice.
Original image: red layer opacity is 50%
Figure 14.117. Composited Preview Example
Composited option unchecked: in preview, red layer is above all other layers.
Composited option checked: in preview, red layer is at its right place, like in layer stack.
Two sub options are available:
- Preview linked items: display transformation of all linked layers rather than the currently selected one.
Two layers linked - Synchronous preview: this option is experimental. The idea is to render the preview as soon as you change the transform. So instead of waiting for the mouse to stop moving, it renders the result immediately. If GIMP can render everything fast enough, this means a much smoother and more instant feedback.
But this option also blocks everything until the preview is done rendering. This means, GIMP can become much less responsive, usually when the layer is very large. That's why this is disabled by default.
Guides
This is a drop down list where you select the type of guide lines which suits your transforming. All the guides uses a frame to mark the image's outline in addition to the lines used by the different selections.
No guides
As the name tells you, there are no guides used.
Center lines
Uses one vertical line and one horizontal line crossing each other in the center of the image or layer.
Rule of thirds
Divides the transforming area in nine equal parts by adding two horizontal lines and two vertical lines equally spaced. According to this rule the most interesting parts of the image should be placed at the intersection points.
Rule of fifths
Just as the “Rules of thirds” but divides the area in five by five parts.
Golden sections
Also called “The Golden Ratio”. This divides the transforming area in nine parts using a mathematical formula proportioning the parts to each others and to the area to be transformed.
Diagonal lines
Divide the transforming area using diagonally lines.
Number of lines
Puts a rectangular grid with equal numbers of vertically and horizontally lines. The number of lines is set in the slider popping up when this guide is selected.
Line spacing
Puts a rectangular grid on the transforming area using the spacing between the lines set in the slider.
Transforming Paths
If you for some reason want to transform paths, it is possible to do this using the transform tools.
Figure 14.118. Rotating paths
Paths dialog
Option modus: Path
When the path is drawn go to the path dialog and click on the first field before the path outline in the dialog window to get the eye icon visible. Then choose the transformation tool and in the upper part of the option dialog click on the path icon to tell the tool to act on the path.
Do the transformation the usual way and confirm it when finished. It could be a good idea to set the Guides to “No guides” to get the path more recognizable.
When the transformation is finished, choose the path tool and click on the changed path to activate it again for further working on it.
Bottom Line
So I hope I justified with the toolbox of the GIMP. This blog is for those who are learning graphic designing techniques. GIMP is just not the best but the finest software to use to brush up your editing skills…
Happy Editing!